Food waste is one of the largest contributors to climate change because landfills are one of the largest emitters of toxic methane gases. If everyone composted, methane levels on our planet could be reduced drastically! It’s estimated that at least one-fourth of all landfill waste could have been composted. It’s crazy to think that a quarter of our waste that goes in the bin could rather be turned into nutrient-rich soil.
What’s worse is that even though we’ve been innocently throwing away food scraps under the assumption they’ll biodegrade in landfill, the problem is it actually doesn’t. All that compacted trash, a mix of food waste and plastic (which only further insulates the food from oxygen) gradually gets pushed deeper and deeper into the ground and settles in an oxygen starved environment where very little microbial activity can take place. So instead of biodegrading it lets off a very potent methane gas without ever really fully biodegrading.
I know that personally since I’ve started composting, I’ve managed to halve my home refuse. That’s before I’ve even taken into account recycling the plastic, glass and other bin-destined items on top of that. So if you’re tired of lugging smelly black bag after black bag out to the wheelie bin every few days, it’s time to consider composting.
Some common misconceptions of home composting are that it’s really complicated and messy, takes ages and smells funny. These are all true if you compost the wrong way. Luckily, composting the right way is quite simple: Just keep adding layer after layer of organic materials, give it time and before you know it you will have created a concoction that resembles a beautifully earthy crumbled chocolate brownie for your garden. I had you at chocolate brownie didn’t I?
So let’s get started…
The only “sciencey” stuff you really need to know is that composting really boils down to four things that need to be present in your compost heap for it to work properly. Namely, nitrogen, carbon, air, and water. These factors work together to feed and sustain life for the micro-organisms that break down everything and speed up the process of decay.
Great, but where on earth do I find nitrogen and carbon just lying around I hear you ask…
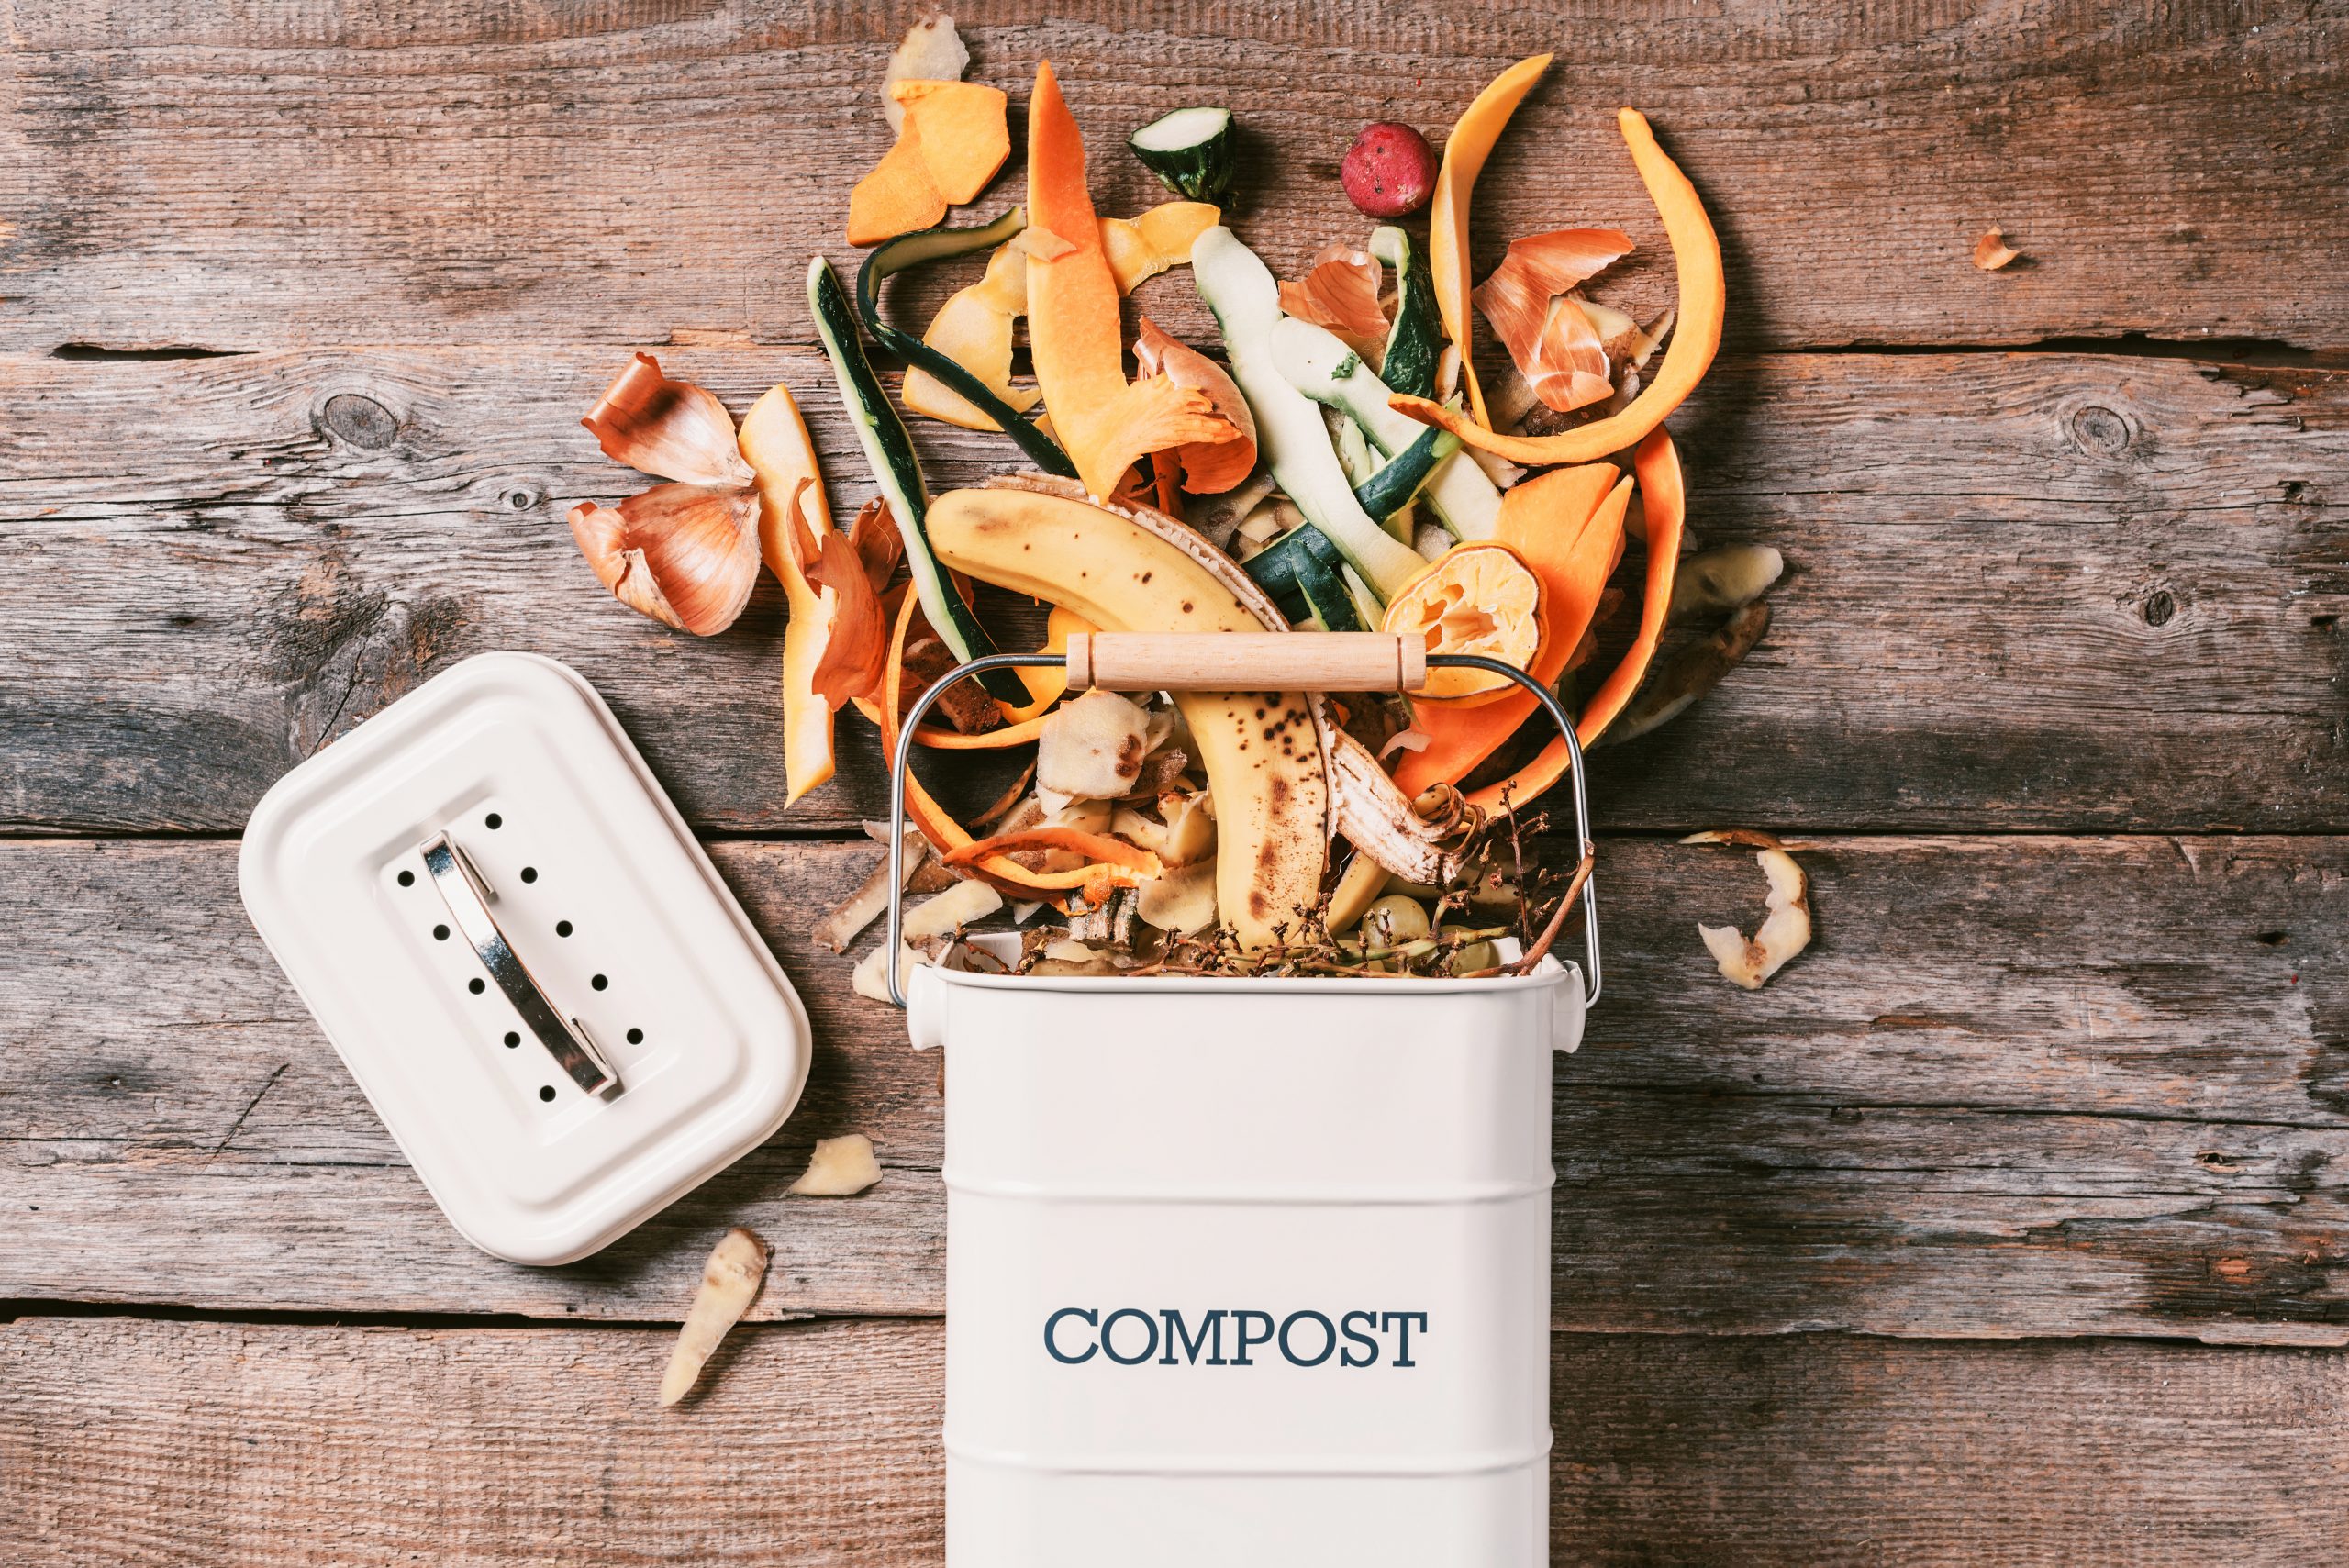
All you need to do is separate your kitchen scraps and garden waste into two categories:
Green matter (nitrogen): Is basically anything wet and/or green – coffee grounds, veggie peels and fruit off cuts, tea leaves, those pesky bread crusts your kids refuse to eat that hitch a ride back home in their lunchbox. Those lonely grapes lurking at the back of the fridge that are fast becoming unwanted raisins. Chicken/horse/guinea pig manure, grass cuttings, leaf trimmings after a well overdue pruning session before your mother-in-law visits and exclaims at the state of your garden.
Brown matter (carbon): Is basically anything dry and brown – Dried fallen leaves, shredded tree branches, cardboard, newspaper; hay or straw; and wood shavings. Oh, and your mother-in-law if she’s not careful!
But seriously, other than mother-in-laws there are only a few things you shouldn’t add to your compost heap:
What NOT to add to your home composting system
- Meat, dairy & fatty/oily substances
Avoid adding these into your compost heap as they can encourage bad odours and attract vermin and bad bacteria
- Carnivore manure (dog & cat poo)
These can contribute to bad odour and attract harmful pathogens to your heap
- Onions, garlic and citrus peels
They are said to repel earthworms and potentially could take a lot longer to biodegrade than the rest of your compostable items. So if you have a small heap or are just starting out, try and avoid adding these at first
Tips:
- Crush up egg shells before adding them to your heap, this will speed things along, especially if you have a young compost heap and want to give everything a head start in a speedy direction
- Cut open used tea bags and add only the tea leaves to your kitchen compost waste. Most teabags they use plastic to seal them.
- If in doubt about any packaging that claims it’s “biodegradable” rather don’t add it to your compost heap. Chances are it might be biodegradable but not necessarily compostable. Everything (even plastic) is technically “biodegradable”, it will breakdown in the environment eventually, but in the form of microplastics, and you don’t want that in your compost! Even things that state they are “compostable” if you read the fine print it will often state that it is only compostable under special industrial composting conditions. Which simply means that it needs to be mechanically broken down under the controlled conditions of an industrial facility and will no breakdown in a home composting environment.
- If you have a chipper it would really speed things along if you added sticks, twigs and large leaf fronds such as palm fronds or tree limbs through the machine to shred everything into smaller pieces. But it’s not necessary to rush out and buy one just for the sake of your compost heap
How to get started
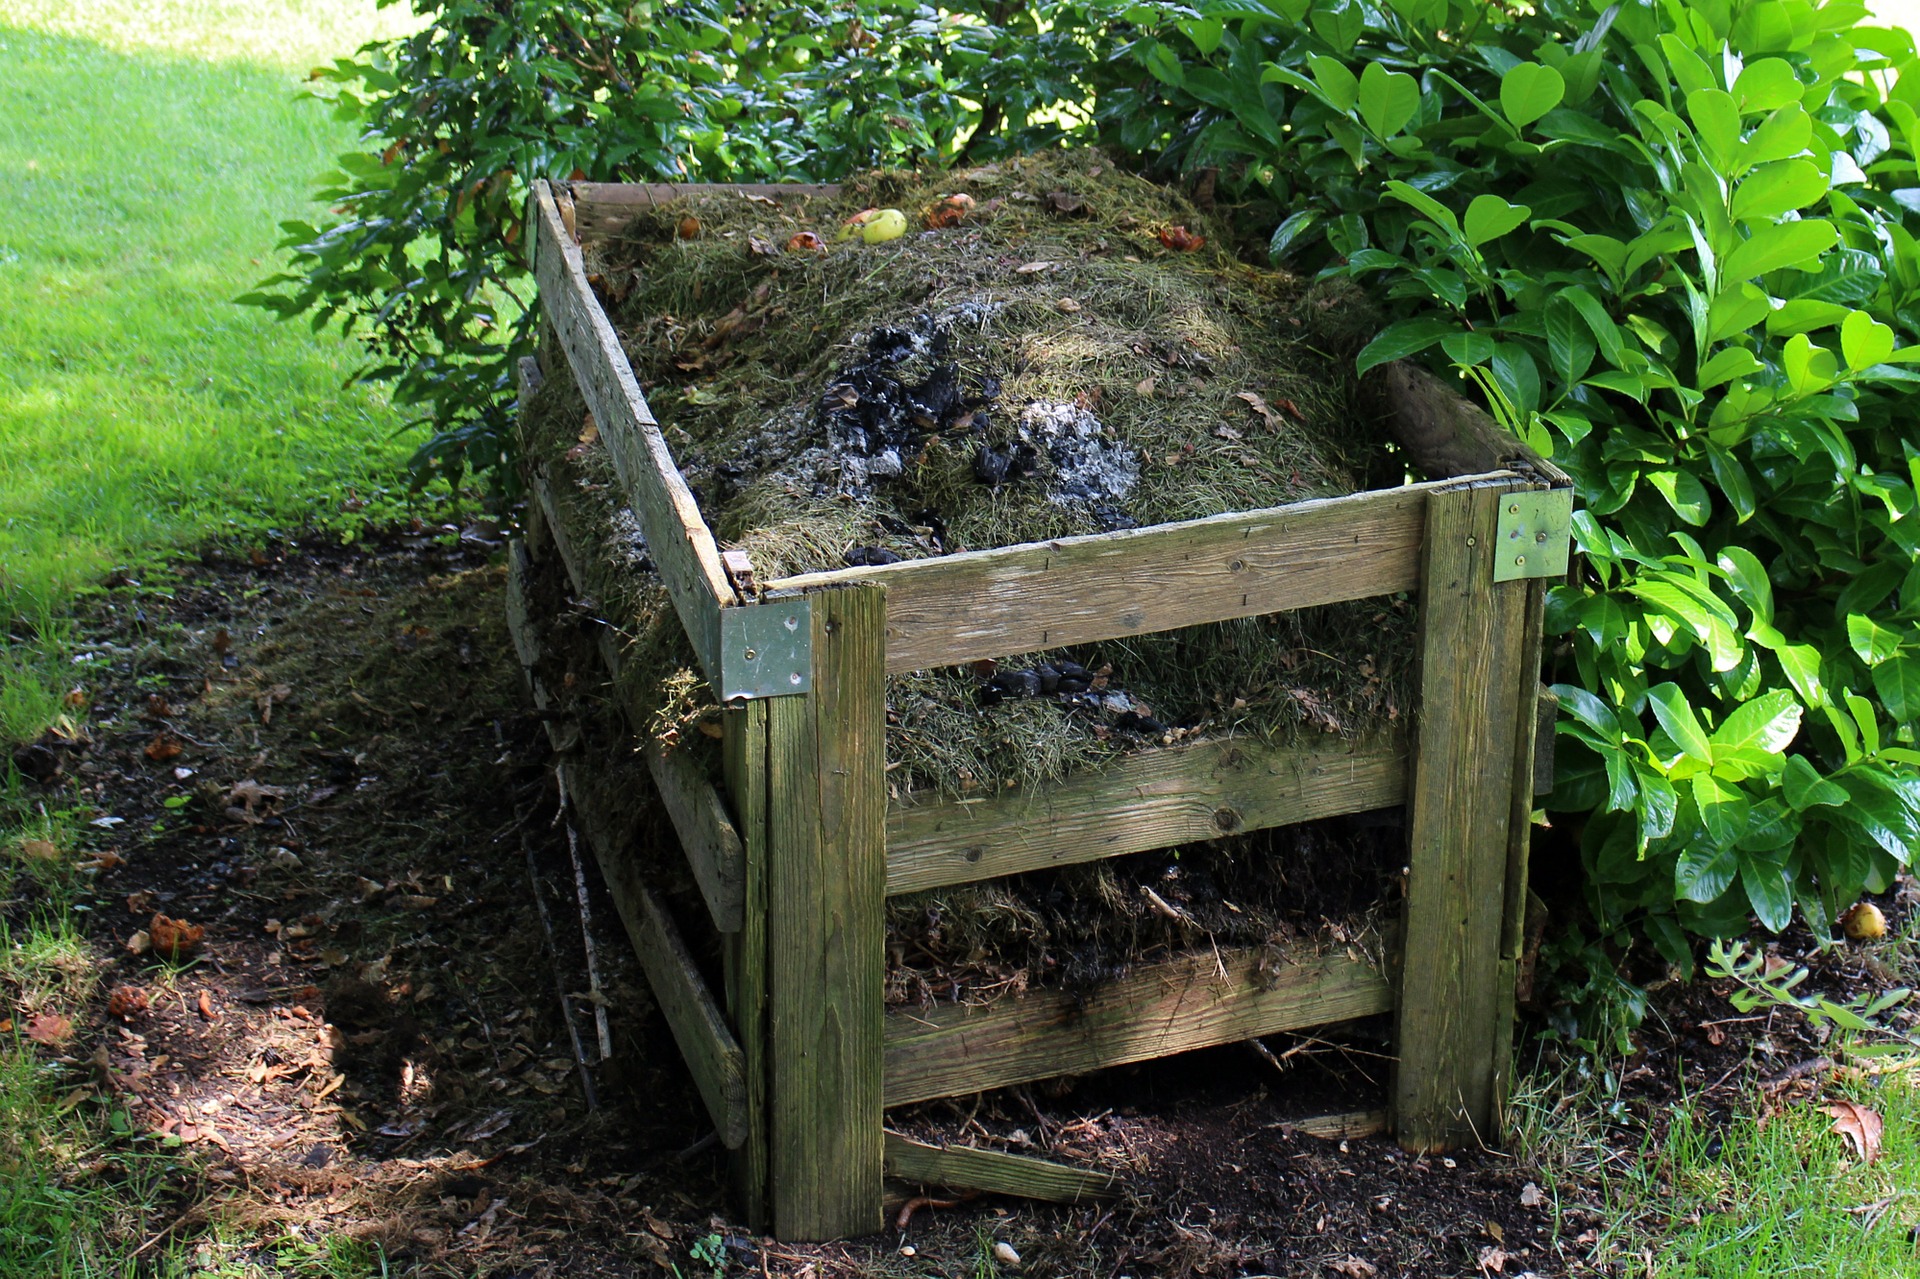
If you have a garden, pick a discreet spot tucked away somewhere ideally getting full sun for most of the day as the heap will need heat to help things along. Repurposing an old crate or drum is a great option as it will keep it all contained. But make sure it has plenty of ventilation as oxygen is a vital part of the process. If necessary, pull out a few slats in the crate or add holes into the drum to allow air to circulate.
Leave the base of whatever container you choose bare to the ground. This will allow all the pre-existing micro-organisms and earthworms to travel around freely and allow for drainage and stop your compost heap from becoming water-logged.
If you don’t have space there are plenty of home-composting kits available that will happily inhabit a garage, patio or apartment balcony.
Once you’ve chosen your location it’s time get things off to the right start. Add alternating layers of brown matter and green matter and if it’s been particularly hot and dry keep the heap moist. You can even throw on buckets of dirty bath water, keep an empty bucket next to you in the shower to catch residual water or used washing up sink water if you live in a drought-affected area. However if you notice that your heap is looking too wet or starting to smell at all, add more brown matter and give it a good turn over with a rake or pitch fork to aerate it. Once you get your compost pile started, you’ll find that it’s an easy way to repurpose kitchen scraps and other organic materials into something that can help keep your plants thriving.
If you really want to speed things up you can add an organic compost starter readily available online or in garden centres and keep topping up your compost heap every other month as a good way to boost microbial activity. Jump starting your heap with special composting worms (red wrigglers) that are often available to purchase online, in garden centres or obtain an ice cream tub full from a fellow composting comrade.
Now that you’re raring to start you don’t need anything more than a container on your kitchen counter and some food scraps. When choosing a container to repurpose don’t go too large, you want to be emptying the container every few days otherwise it will start to smell. I use a large old metal mixing bowl that doesn’t have a lid. I started out using a lid, but I found it actually started to smell more as it was being starved of oxygen. But it’s a personal preference, I don’t mind seeing my scraps sitting there begging to get out there and mingle with the rest of the heap. I also find a metal container easier to clean and sterilize than a plastic one that tends to stain easily and retain the odours. But use whatever you have on hand, you really don’t need any fancy equipment.
Happy composting!


Leave a Reply